
In part 1 of this series, we covered some blogging best practices. Now that we understand these, we can team them together and learn how to use the Yoast SEO plug-in. Let’s get started.
NOTE: This post does not cover the more advanced settings of the plug-in, such as those found under “Yoast WordPress SEO: General Settings”. If you are a developer – or an adventurous blogger – and are looking for more advanced information, I highly suggest reading the articles by Ahmad Awais on WPtuts.
How to Use the Yoast SEO Plug-in
There are quite a few SEO plug-in tools available on the market today… Most agree, though, that the Yoast WordPress SEO plug-in is the best. It’s robust functionality combined with it’s ease of use make it the ideal combination for the majority of bloggers today. Let’s dive right in and start using this fantastic blogging tool.
Begin by writing your post using the best practices learned in part 1 of this series. Once this is done and – assuming you are in the “Post” section of the WordPress admin dashboard – scroll down the page and look for the panel titled “WordPress SEO by Yoast”. You will see four tabs:
- General
- Page Analysis
- Advanced
- Social
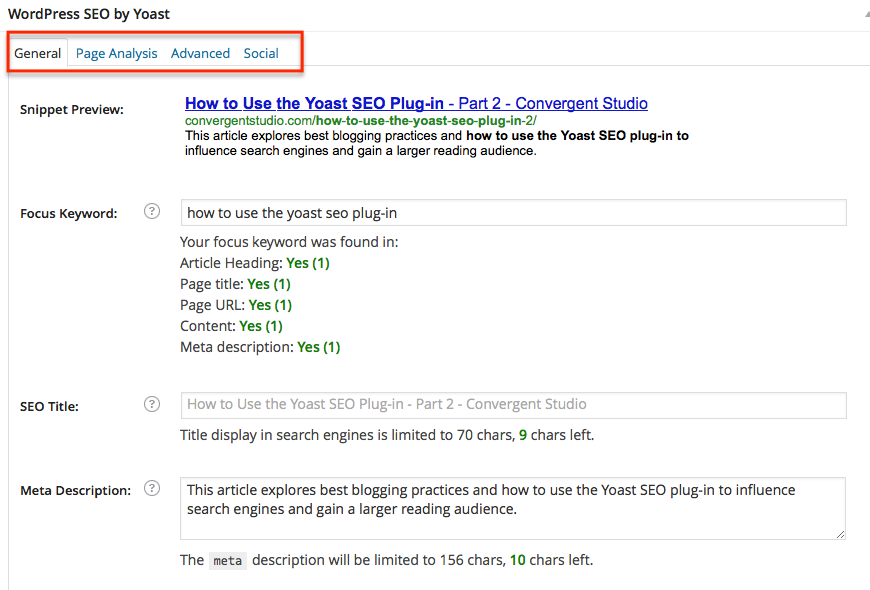
Yoast SEO Plug-in: Tabs
This post will focus on the first two… “General” and “Page Analysis”. Let’s start with the “General” tab.
General Settings
First, you will see your “Snippet Preview”. This is how your blog post in it’s current state will appear when it is shown by Google and other search engines. Don’t like this? Well, we will soon get our opportunity to change it up.

Yoast SEO Plug-in: Snippet Preview
Next, you will see “Focus Keyword”. This is the field in which you place the main keyword or phrase that you are writing about. For example, if you are writing about how to cook blueberry muffins, you could enter “how to cook blueberry muffins”. Note the neat thing the plug-in does here… It begins auto suggesting keywords and phrases, which you can carefully choose to accept or ignore.

Yoast SEO Plug in: Focus Keyword
Now comes your “SEO Title”. Remember the “Snippet Preview” we just reviewed? Well, this is the very top sentence and link that shows there. This is the area where you can change this to look just how you want it. Be sure to note that the title is limited to 70 characters. To help with this, the plug-in counts the characters for you and let’s you know how many you have left to use. Don’t go over or your description will get cut-off! One tip here… It is common practice to put your blog post title (remember to include your main keyword or phrase) followed by the name of your company or blog.
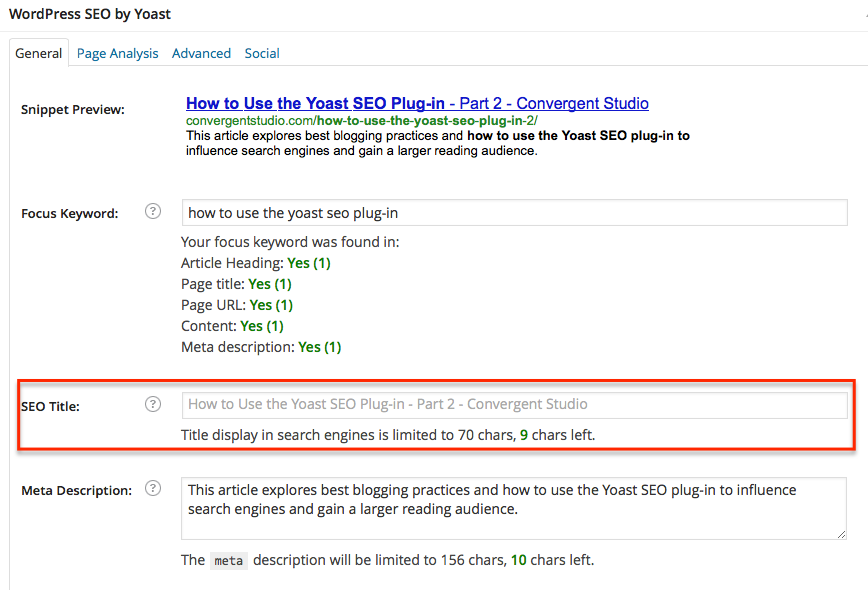
Yoast SEO Plug-in: Title
Last, comes the “Meta Description”. This is the description area that is found just under the first line in the “Snippet Preview” area. Here is where you can edit that piece of content. Remember to include your keyword or phrase, succinctly capture the essence of what the blog post is about, and keep the description within 156 characters.
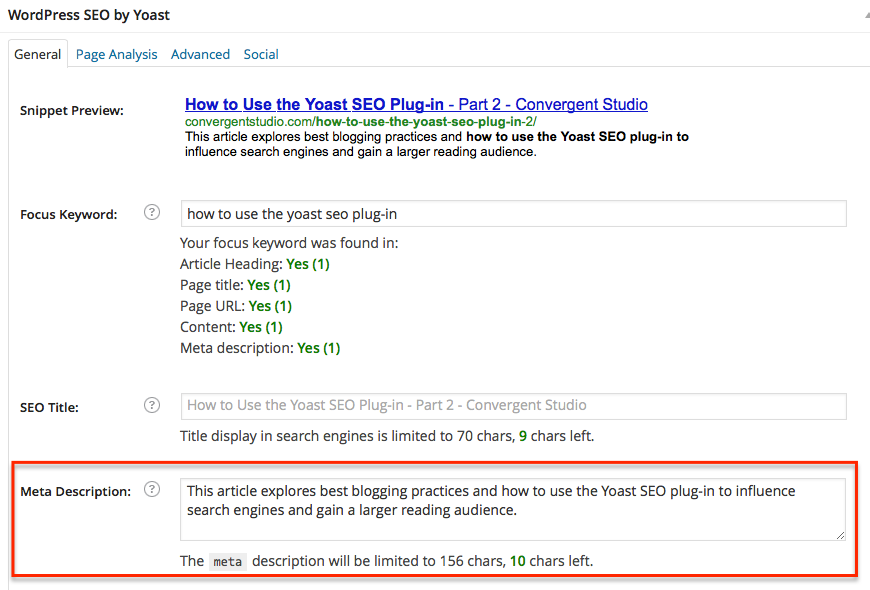
Yoast SEO Plug-in: Meta Description
Before we move on, let’s jump back up to the “Focus Keyword” area. You will notice that the plug-in is tracking where the focus keyword has been used in the:
- article heading
- page title
- page url
- content
- meta description
If this shows up as a red “no” in any place, it is a good time to go back and correct this. For example, if it is not being used in the article heading, go up the page and re-title your blog post so that it contains your keyword or phrase.
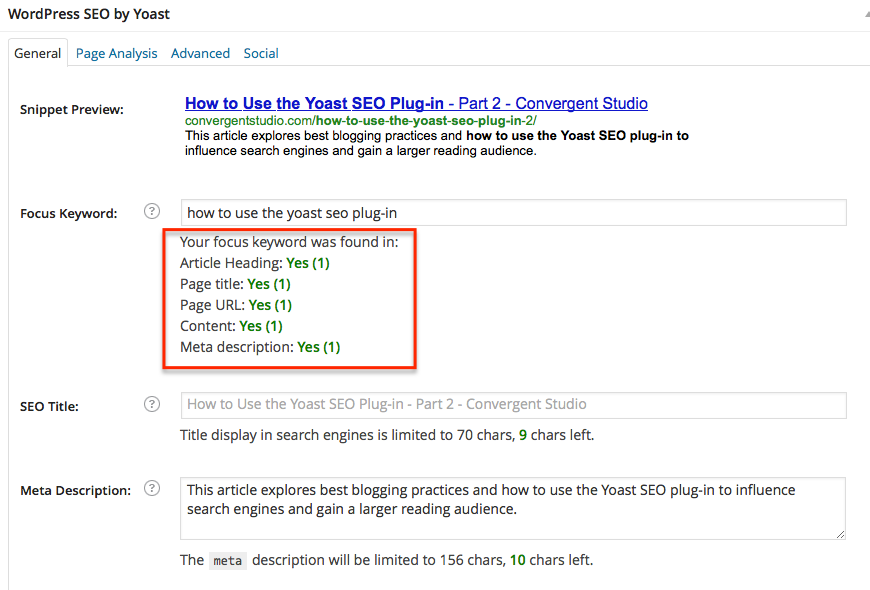
Yoast SEO Plug-in: Keyword Use
Now that you have all of the above set, it is time to use Yoasts’ “Page Analysis” tab and functionality.
Page Analysis
Let’s start by going to the top right corner of the page and clicking on “SEO: Check”. The Yoast plug-in will now review your post in a matter of seconds and provide you with feedback you can find under the “Page Analysis” tab. Note that the circle next to “SEO: Check” is color coded depending on how SEO friendly your post is. Green means you’re doing great, while red means you have some fixing to do! There are other colors in between, but your goal is to always get to green.
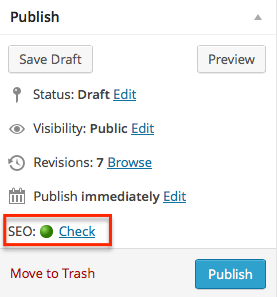
Yoast SEO Plug-in: Check SEO
Let’s see what the results have to say. Scroll back down the page and click on the “Page Analysis” tab. You will now see a number of suggestions for you to take in making your post more SEO friendly. Think of these as “action items” for you to follow in order to get the blog post properly indexed by search engines and more visible to your audience. These suggestions range from fixing keyword density (how many times your keyword or phrase has been used) to the length of the post and it’s word count. It even reviews the “readability” level of your post and gives suggestions for that!
Simply follow the suggestions provided and – when done – continue to hit “SEO: Check” until you are satisfied with your results. For some, this means simply getting the green light. For others, it means fixing every last detail. How far you go is completely up to you!
Once done, you now have a fantastic blog post that is both well put together and also optimized for search engines. You now also have the knowledge it takes to follow blogging best practices and how to use the Yoast SEO plug-in.
Better yet, you are engaging your audience and giving them better content. And hopeful, with just the right touch, you are attracting more and more readers each time you produce more content for your site!
Good luck blogging!